
For a while now, I’ve been wanting a six board chest, in which to keep my feast gear and other sundries at events. I have resigned to myself to the fact that I don’t have time to do all the things I want to do. And even more importantly, I don’t have to do the things I don’t have any interest in doing, even when the outcome of those activities is a thing I want or need. I am not a wood worker, and I don’t really want to cultivate those skills right now. So I put out a call-out to my reenactment friends, to see if any of them would be interested in doing an artisan trade.
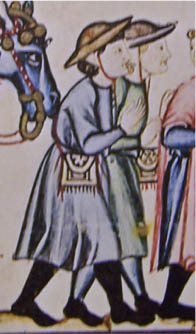
Master Juan Carlos, a Laurel in my local Barony, let me know that he’d be willing to make a chest for me (I’d already seen and admired one that he made for himself, so I was excited) in exchange for a couple of embroidered pouches similar to those from the Cantigas de Santa Maria. I looked through the illuminations he sent me and settled on two designs. One like this, with a pouch flap and a neat rounded motif…
And one like the yellow ones below, with no flap and a diamond design.  I picked out my colors (red and black on natural linen, and indigo blue on yellow) and sketched out my designs on the fabric. I decided to go with DMC Pearl Cotton, since I have a metric ton of it, it launders well (I try not to use delicate fibers unless I know who they are going to), and makes a nice bold clean line.

I decided on chain stitch, as it makes the boldest line with a single row of stitching, and the designs are all linear. I also started off using a hoop, but gave it up as I found it was more trouble than it was worth. This red and black design has the flap motif incorporated into the back; the pouch flap will fold over at the top of that line, halfway through the circle.

The pouch laid out, so you can see basically what it will look like when it’s all folded up.


 I finished up all the red, and then began the black, just embroidering another line right next to the one that had already been done.

I really like how they look together; so bold and graphic.

All finished up with the first embroidery, about to start on the second. Part two will be the second pouch embroidery and how I made them all up. Tune in Monday!
